
RAW art is a team of art specialists who run art incursions in schools and kindys throughout SEQ and Sydney/ Newcastle. We also have a fabulous range of DIY art kits which we send to schools and kids throughout Australia.
Holepunch art
How about a handful of super easy projects using the humble holepunch? These activities use minimal materials, and can give the kids some good practice wielding that sometimes awkward instrument. Holepunches are great for making puppets, and for forming patterns in paper. You can get them in a range of sizes and some pretty complex shapes, but these activities use that standard holepunch you should have lying around in your desk draw.
Also a great way to develop those finemotor skill for those littlies – feeding the card or paper into the holepunch, and pressing down hard can be tricky but fun! Once they get the hang of it they can’t stop!
Robots:
This one is easy enough for the young ones, age 5 and up. If you have some pre-cut shapes then that will help, but otherwise just give your kids an A5 bit of card, and get them to cut half off for the body, and the rest into a range of rectangles or squares.


Arrange the geometric shapes into a robot on your background card or paper. Each piece can get holepunched in a different way, the head can get some eyes and a mouth, with the rest of the body you can talk about how robots are covered in buttons and screws. You could even fold the body shape in half to get some extra holes in the middle of the body.
Glue down.
Puppets:
I made a simple caterpillar using the holepunch and some card. Start with a range of circle shapes, then holepunch four circles, one at each corner.
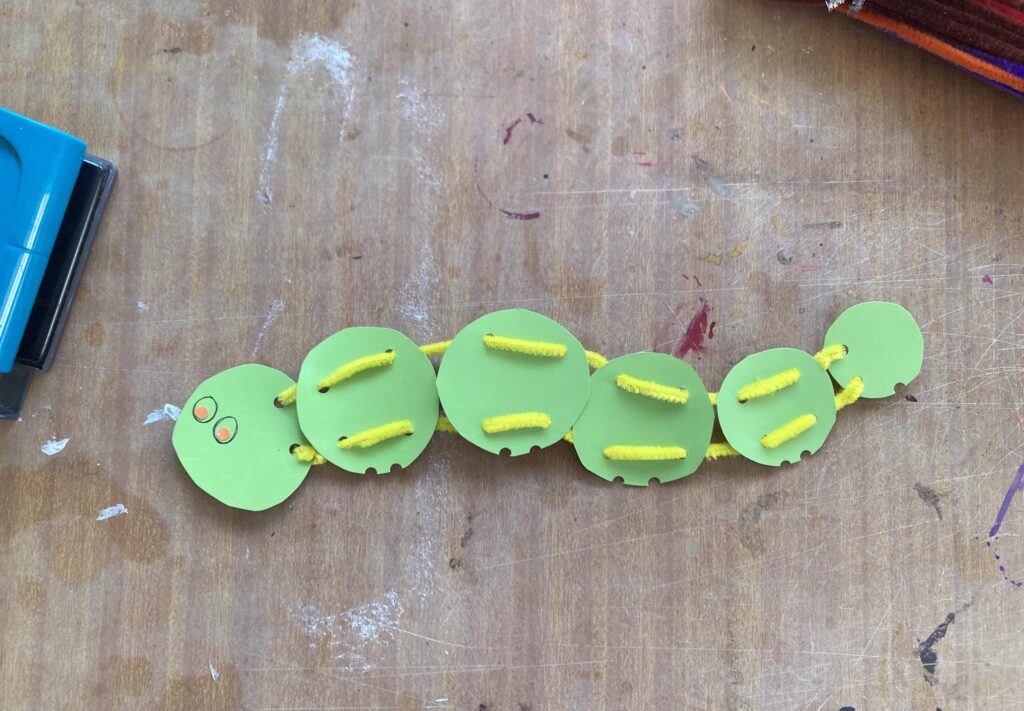
Thread/weave a pipecleaner through each side and loop it onto the head and tail. This caterpillar moves too! Add some eyes for character.
Night eyes:
Spooky eyes in the night are so easy to make, and these look so effective. Cut out some various eye shapes from white and/or yellow paper while it is folded in half, that way you get a set each time. While they are still in sets holepunch each one. Arrange and glue onto some black card. BOO!

Make sure you keep all of the little circle cutouts too – these will be perfect for other crafty arty projects. Waste not want not!
Until next week!
Tracy x