
Easter bunny drawings
As we inch closer to the Easter holiday, I have been thinking of crafty ways to get the kids busily making, in the classroom, or at home.
This cute easter activity centres around drawing a personalised bunny portrait. I know drawing can sometimes be intimidating for people of all ages, so I have tried to simplify this project and offer plenty of step-by-step guidance.
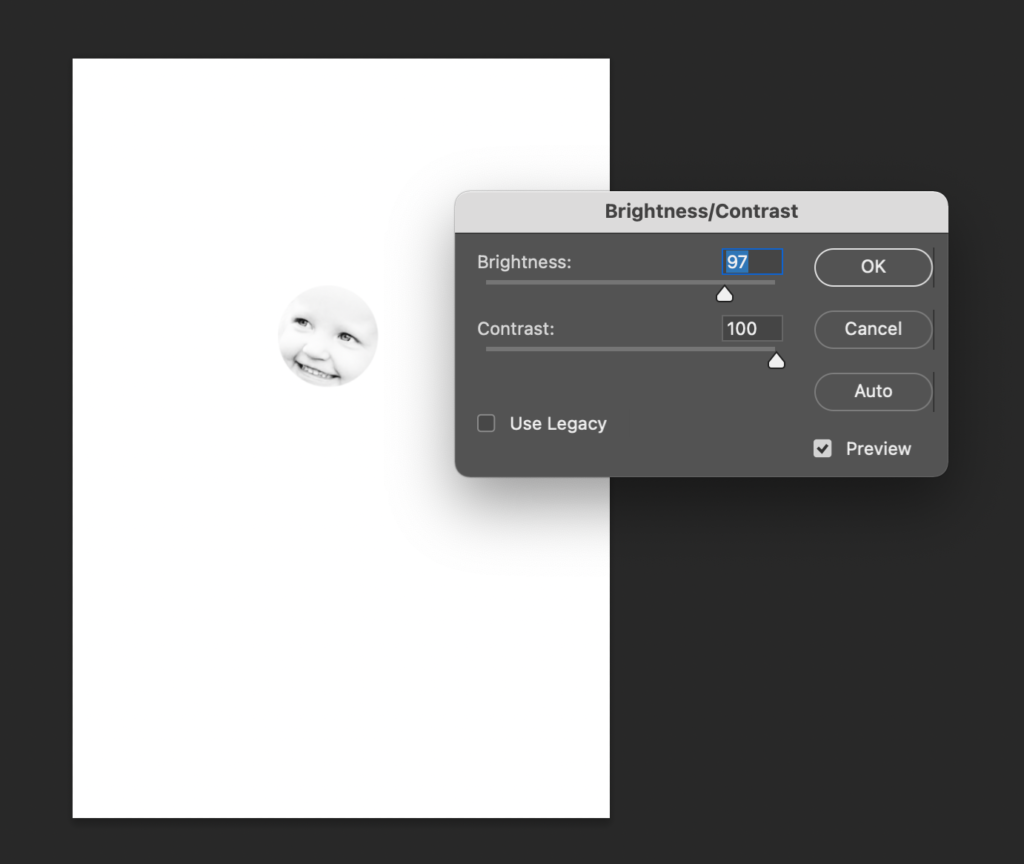
The activity starts with a digital photo which needs some simple manipulation achievable on most basic photo viewing/editing software. Try and take or choose a photo that is face forward, and with plenty of light in it. Open it in your software and edit it to black and white. Then edit the brightness and contrast. As in the image below, up your contrast to the darks are very dark and the lights very light, and then brighten until the face almost disappears except for the features. This might take a bit of play with your digital tools to get right.
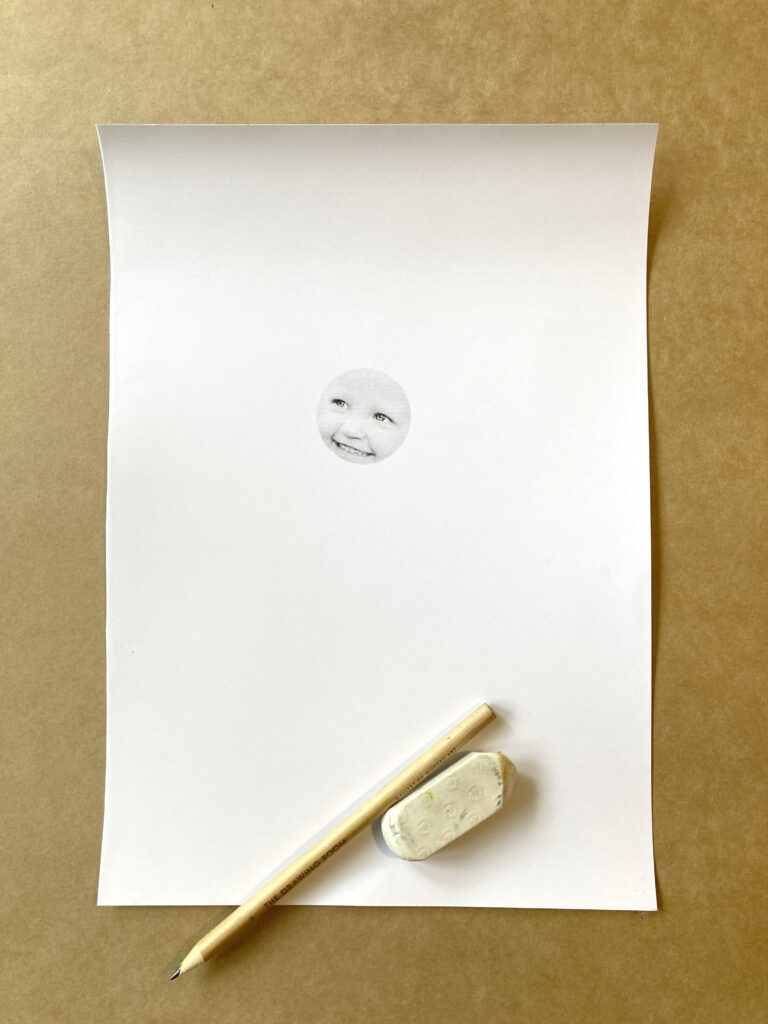
Either cut the face with a digital cutting tool and paste onto a new document (Word would work), or just print the whole photo and cut the face manually then stick it onto A4 card. I recommend white card as a background for this project, it is nicer to draw on and will feed through most printers.

I recommend a 2B pencil, and to press very lightly with your initial drawing. Kids find it frustrating when they make mistakes they can’t erase, so get the kids to press gently so the eraser works properly.
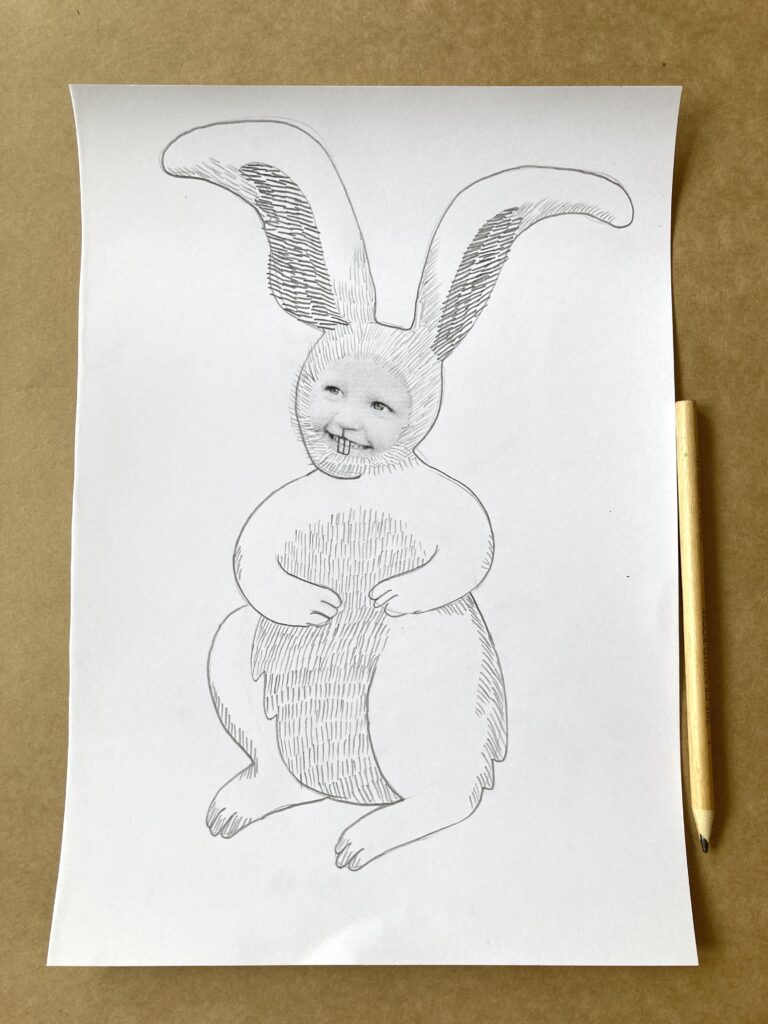
Start with drawing a circular shape around your face, then some large bent oval ears on top of the head. A big cuddly bottom-heavy oval body will get attached to the neck and should stretch towards the bottom of the page.

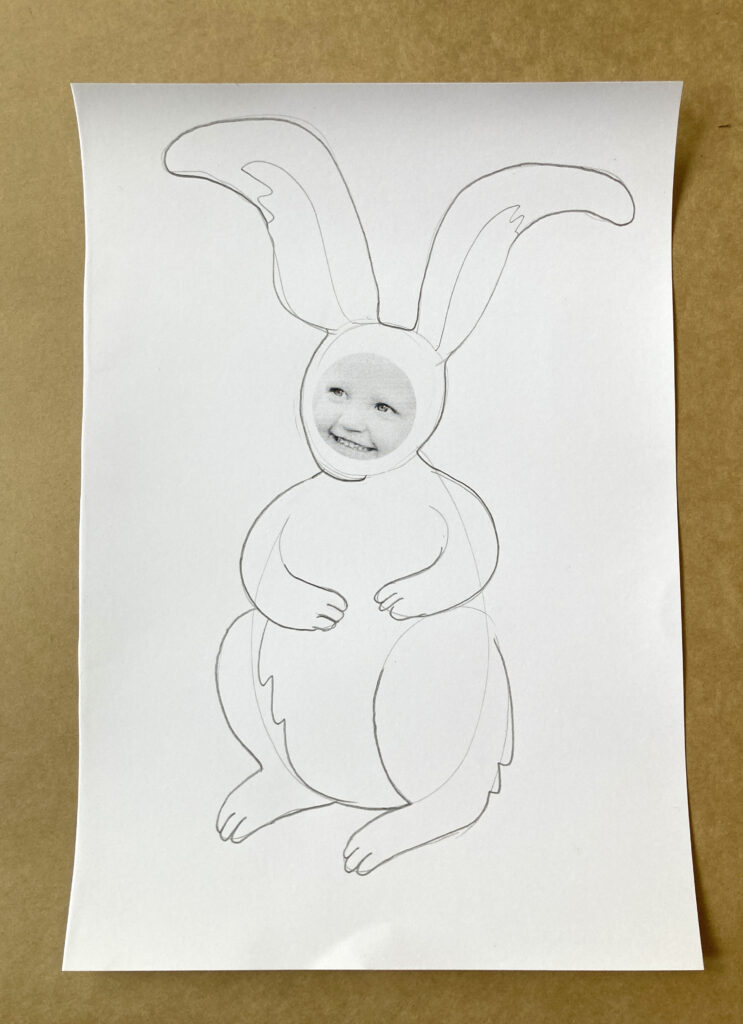
Now add some chunky bunny legs with sausage feet sticking out front. Then some curved sausage arms hugging in towards the belly. Add a fluffy tail if the perspective makes sense.
Trace in darker the outlines you are happy with, include some fluffy texture in parts, and some shapes that represent the inner ear. Carefully rub out mistake lines or unnecessary sketched lines.
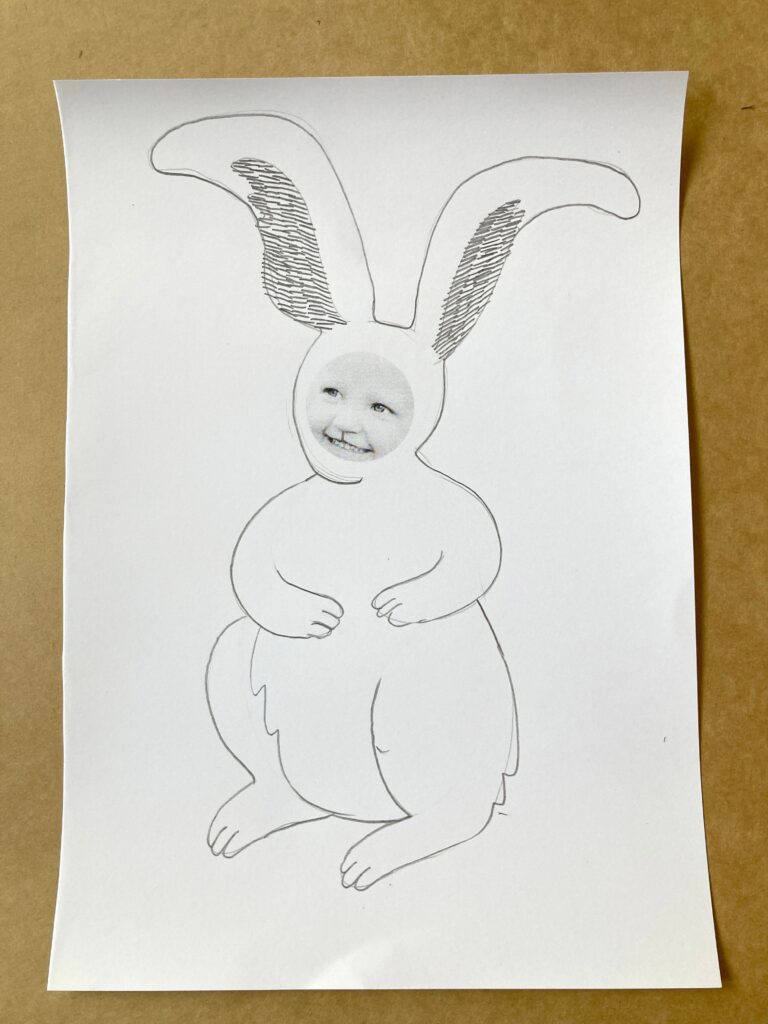
Start texturing, beginning with dark fluffy texture inside the ears. Then apply lighter pressure with your texture in other parts of your choosing. You can talk with your kids about how the texture can capture ‘shadow’ in your image. Or you can just choose to use the texture in select parts of the body. Add some bunny teeth!
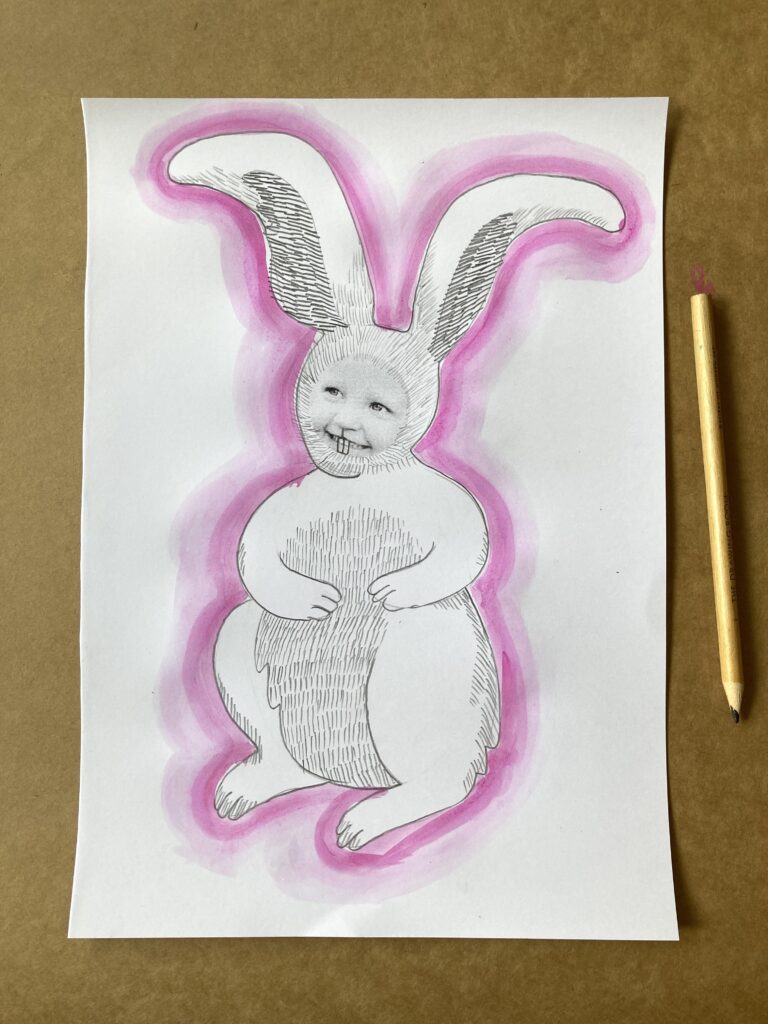
While I loved the final picture, below is an idea to extend the artwork with a bit of colour. Using just a single watercolour paint, I outlined the bunny and faded the edges of the colour border. The bunny just hops off the page!
Looking for a couple of other Easter projects….??
Try these……….
Easter Paper Projects – turn paper into vibrant Easter art
Easter Cutesy Chicks – a super fun printing project
Beaut Bunny Baskets – turn an egg carton into a festive basket
Wishing you and your family a lovely Easter break !\
Tracy